 SCREEN
📌 Quick Summary: Google Trends shows a massive spike in searches for "monitors for accuracy" and "why are my monitors not detected." As a display technician, I see these as two sides of the same coin: you cannot have an accurate monitor if your computer cannot even see it. This guide covers the science of color accuracy (Delta E, gamut, calibration) and provides a step by step fix for the "monitor not detected" error that is frustrating thousands of users right now.
I have been calibrating and repairing monitors for over a decade. And if there is one thing I have learned, it is this: a monitor is only as good as its connection.
You can spend $2,000 on a reference grade display with a Delta E of less than 1. But if Windows cannot detect it, it is just an expensive black rectangle on your desk.
That is why the current Google Trends data is so fascinating. On one hand, people are desperately searching for "monitors for accuracy" they want to edit photos, grade videos, and do precise work. On the other hand, a huge number of people are searching for "why are my monitors not detected" they are stuck with a blank screen, unable to use the monitor they already have.
This guide is designed to solve both problems. First, I will explain what "accuracy" actually means in a monitor, and how to choose the right one. Then, I will walk you through the exact troubleshooting steps I use in my workshop to fix the "monitor not detected" error.
A color-accurate monitor is a tool. But only if your PC can see it.
Part 1: The Science of an "Accurate" Monitor
When people search for "monitors for accuracy," they usually mean one of two things: color accuracy (for creative work) or visual accuracy (for reading text and seeing fine details). Let us break down the technical specifications that actually matter.
Delta E (ΔE): The Number That Defines Accuracy
Delta E is the measurement of how much a displayed color differs from the "true" color. A Delta E of 1 is the threshold where the human eye can just barely perceive a difference. A Delta E of less than 1 is considered professional grade accuracy.
Most consumer monitors have a Delta E of 3 to 5. They look fine for gaming or watching YouTube. But if you are editing a photo, a Delta E of 5 means the skin tones on your screen might look different than they do on a client's phone. For creative work, you want a monitor with a Delta E of less than 2.
To test your monitor's accuracy, you can use our free Screen Medic diagnostic tool to check for uniformity issues and dead pixels, which can affect perceived accuracy.
Color Gamut: sRGB, Adobe RGB, and DCI-P3
A monitor's gamut is the range of colors it can display. Most web content is designed for the sRGB gamut. If you are doing print work, you need a monitor that covers Adobe RGB. For video editing, DCI-P3 is the standard.
An "accurate" monitor is one that covers 99% or 100% of the target gamut. A monitor that only covers 90% of sRGB will struggle to display certain shades of red and green correctly.
The Panel Type Matters
For accuracy, you want an IPS panel. IPS panels offer the best color accuracy and viewing angles. VA panels have better contrast but can suffer from color shifting. TN panels are fast but have poor colors.
For a deep dive into panel types, read our guide on OLED vs LCD.
Part 2: Testing Your Monitor for Accuracy
You do not need to be a professional calibrator to test your monitor. You can do a basic accuracy check yourself.
The Uniformity Test
Display a pure white screen and a 50% gray screen. Look for "dirty" patches, color tinting (yellow or blue areas), and clouding. An accurate monitor should display a uniform color across the entire screen. If you see patches, it is not suitable for professional work.
The Gradient Test
Display a smooth gradient from black to white. You should see a smooth transition without "banding" (visible stripes of color). Banding is a sign that the monitor cannot display subtle color gradations accurately.
Part 3: The "Monitor Not Detected" Crisis
Now, let us address the second trend: "why are my monitors not detected." This is one of the most common technical support issues I see. You plug in a monitor, and Windows simply does not see it.
Based on Microsoft support forums and my own experience, this is almost never a hardware failure. It is almost always a software, cable, or port routing issue [citation:2].
Here is the exact sequence I use to diagnose a "monitor not detected" error.
Step 1: The "Force Detect" Trick
Right-click on your desktop and go to Display Settings. Scroll down and click "Detect." If nothing happens, do not reboot yet.
Press Win + P and select "Extend." Even if the Detect button fails, this can sometimes force Windows to activate a hidden display profile [citation:2].
Step 2: Check Your Port (The #1 Mistake)
This is the most common mistake I see. If your desktop PC has a dedicated graphics card (GPU), your monitor must be plugged into the GPU, not the motherboard.
The motherboard ports (near the USB ports) are for the integrated graphics. If you plug your monitor into the motherboard while you have a dedicated GPU, the monitor will often not be detected, or it will run at a lower resolution. Move the cable to the horizontal slots lower down on the case [citation:2].
Step 3: The "Win + Ctrl + Shift + B" Reset
This is a secret shortcut that every PC user should know. Press Windows + Ctrl + Shift + B. Your screen will blink, and your PC will beep. This command resets the graphics driver without rebooting your PC. In many cases, the monitor will immediately be detected after this reset .
Step 4: Check the Monitor Input Source
Some monitors have an "Auto" input setting that fails to detect the correct source. Use the physical buttons on the monitor to manually select the input source (HDMI 1, HDMI 2, DisplayPort, etc.). If the monitor is stuck on the wrong input, Windows will never see it [citation:2].
Step 5: Device Manager Cleanup
Open Device Manager. Expand Monitors. If you see "Generic PnP Monitor" or greyed out entries, right click and uninstall them. Then, expand Display Adapters. Right-click your GPU and select "Disable device." Wait 10 seconds, then "Enable device." This forces Windows to re scan all connected displays [citation:2].
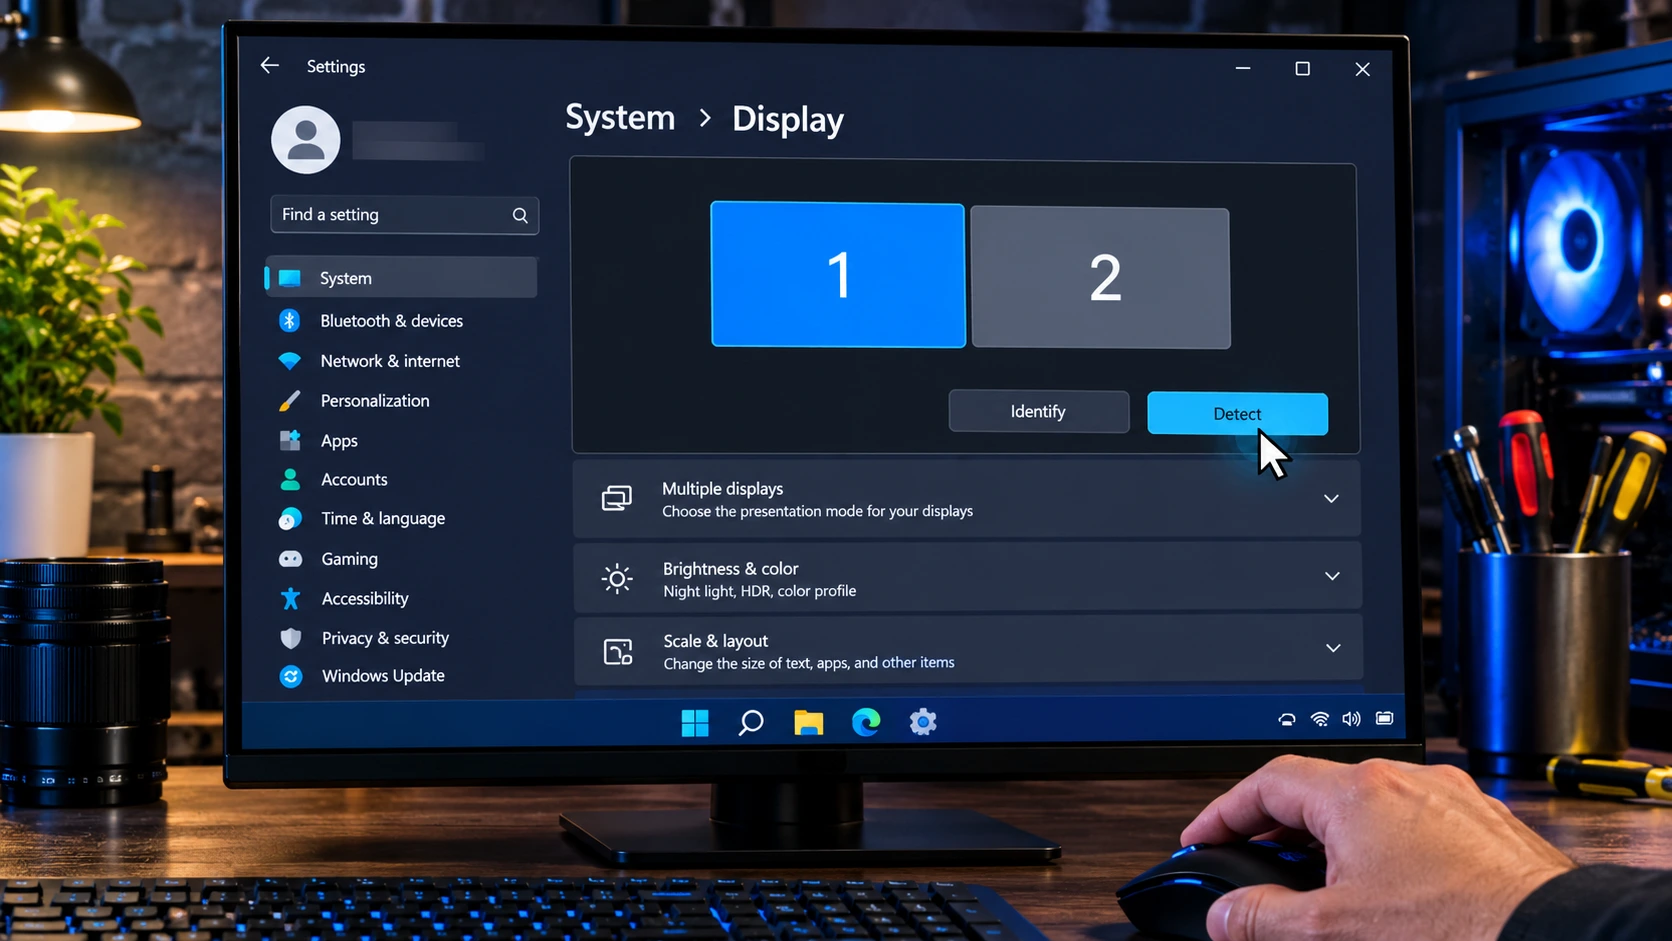
The "Detect" button in Windows is your first line of defense.
Part 4: The "Flicker Free" Factor (Why Your Eyes Hurt)
While researching accuracy, I found another related issue: Flicker Free technology. Many users complain of eye strain and headaches after using a monitor for a few hours. This is often caused by PWM (Pulse Width Modulation) flickering.
PWM flickering is invisible to the naked eye, but it causes the backlight to turn on and off rapidly to dim the screen. This can cause fatigue. A "Flicker Free" monitor uses DC dimming to keep the backlight steady.
You can test your monitor for flicker using your smartphone camera. Point the camera at the screen and lower the brightness. If you see rolling bands or stripes on the phone screen, your monitor is flickering [citation:5][citation:10].
For a monitor to be truly "accurate" for long work sessions, it needs to be both color-accurate and flicker free.
Frequently Asked Questions (FAQ)
What is the best monitor for color accuracy?
Look for an IPS panel with 99% sRGB coverage and a factory calibration report with a Delta E of less than 2. Brands like Dell (UltraSharp series) and ASUS (ProArt series) are excellent choices.
Why is my second monitor not detected?
Check your cable first. If you are using a desktop, ensure the monitor is plugged into the GPU, not the motherboard. Try the Win + Ctrl + Shift + B reset. If that fails, check the monitor's input source [citation:2].
Can a monitor be too accurate?
No. But it can be too bright. A professional monitor is often calibrated to 120 nits for print work. If you use it at 100% brightness, it will be uncomfortable and the colors will look washed out.
What is the difference between sRGB and Adobe RGB?
sRGB is the standard for web content. Adobe RGB has a wider color gamut, covering more greens and cyans. It is used for print work. If you shoot in RAW and print your photos, you need an Adobe RGB monitor.
Final Thoughts: A Tool is Only as Good as Its Connection
An accurate monitor is a powerful tool for creators. But it is useless if your computer cannot detect it. I hope this guide helps you choose the right monitor for your needs and solve the frustrating "not detected" issue.
If you want to test your current monitor for dead pixels, uniformity issues, or color banding, use our free Screen Medic diagnostic tool. It takes 60 seconds and could save you hours of frustration.
💬 Leave a Comment
Have a question or something to add? Share your thoughts below.
Loading comments...